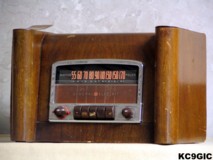
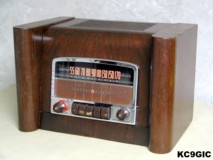
"Before" "After"
Brand: General Electric Co. Year of Manufacture: 1941 Frequency Range: 550 - 1600 Kc
Tube Lineup: 35Z5 GT Rectifier, 35L6 GT Output, 12SQ7 Det/ A.F., 12SK7 I.F. Amp, 12AS7 Osc/Conv., 12SK7 R.F. Amp
Schematic: Available here, courtesy of Nostalgia Air. Riders 13-57
Tube Lineup: 35Z5 GT Rectifier, 35L6 GT Output, 12SQ7 Det/ A.F., 12SK7 I.F. Amp, 12AS7 Osc/Conv., 12SK7 R.F. Amp
Schematic: Available here, courtesy of Nostalgia Air. Riders 13-57
This one was spotted on ebay in June of 2005. It looked complete, with minor damage, and the chrome escutcheon looked rather cool. I won the radio for less than $20.00, being the only bidder. Later on a few examples of this same model sold in excess of $100, one very shiny example went for over $500.00!
The seller followed my packing directions, and the radio arrived double boxed, with plenty of foam packing. Upon initial inspection, the radio was starting to look sort of bad. Just about all of the glue that holds the veneer on had dried out, and the veneer was simply falling off the cabinet. Luckily most of it was there, other than a few small chips. Other than the veneer, the chassis looked to be untouched, and the original finish was intact with some minor flaking.
Electronic Restoration
As before mentioned, the chassis looked to be untouched, and very dusty. The usual replacement of the paper and electrolytic capacitors was the main repair. Extra time was taken to restuff the replacement capacitors into the shells of the originals.
After replacing the capacitors, and the original power cord, it was time to power up the radio. Since this is a transformerless AC/DC type radio, the chassis is used as a common connection in the circuit. This means with a non-polarized power cord, depending on which way you plug in the cord, the chassis can be hot with 120 VOLTS AC! To protect myself, and my test equipment, an Isolation transformer, with a metered variac, was used to power up the radio.
The initial power up was semi successful. Several stations could be received, but the sound was crackling and popping very bad. A little contact cleaner on the controls and switches fixed this. The last obstacle was a broken dial cord, and missing dial pointer. A spool of dial cord was purchased from RadioDaze. The pointer was found through a want add posted on several newsgroups/forums ( Thanks Marty!). My schematic for this radio had a diagram of the dial cord, so this was easy to reinstall. After an alignment, the radio was sounding good.
Cosmetic Restoration
Cosmetic wise, this radio didn't look very bad when first purchased. The cabinet suffered from many pieces of loose veneer. This was all reglued using wood glue, and several clamps. There were a few small chips in the veneer, which were filled in with wood filler. After the filler dried, it was sanded down to match the existing veneer, and a black ink pen with a sharp tip was used to carve in the wood grain. A few coats of Mohawk brand Toner had this blended in rather well.
The original finish didn't look too bad, other than the usual chips and scratches after more than 60 years in existence. The cabinet was thoroughly cleaned with some rags and mineral spirits to remove any grease and grime. Several coats of Deft brand Satin clear lacquer were then sprayed on to seal in the original finish.
One other flaw in the radio was a small section of nasty looking rust on the chassis. A jellied rust remover purchased from Wal Mart was used for this. This product loosened up the rust, which was cleaned off with a brass wire brush.
Final Thoughts
This was a simple restoration, as compared to some of my other projects. The total cost is estimated at under $60.00. The total time spent on the project was probably two months sitting on the bench, and maybe 10 hours of work. As seen in the above "After" photo, the labels on the pushbuttons are still incomplete. I may try to reproduce them some day, for for now I deem this project complete!
© Copyright 2006
"Jeremy's Antique Radios"