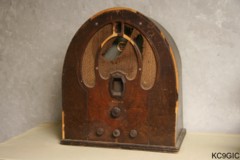
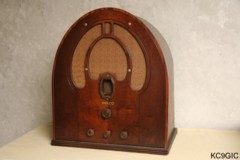
"Before" "After"
Brand: Philco Radio &
Telev. Corp.Year Of
Manufacture:1934 Frequency Range(s): 520-1500 KC, 1.5-4.0 MC, 4.0-11 MC, 11-23
MC
Tube lineup: 80 Rectifier, 42 Output, 75 2nd Det/1st A.F., 78 1st I.F., 78 2nd I.F., 6A7 Det/Osc
Schematic: Available here, courtesy of Nostalgia Air. Riders 4-23
Instruction Manual: Philco 44 Instructions 1.7MB
Tube lineup: 80 Rectifier, 42 Output, 75 2nd Det/1st A.F., 78 1st I.F., 78 2nd I.F., 6A7 Det/Osc
Schematic: Available here, courtesy of Nostalgia Air. Riders 4-23
Instruction Manual: Philco 44 Instructions 1.7MB
This
Philco was purchased from a fellow IHRS in
Indianapolis during a February 2007 swap meet. Lacking any decent
cathedral
style radios in my collection, this one looked like a reasonable
project. The radio was complete parts wise, but the cabinet was
suffering from some major veneer damage, and the speaker cone had been
smashed. Below center: The damaged
speaker and grill cloth.
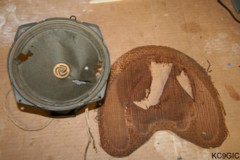
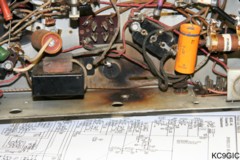
Surprisingly, the chassis for this radio was complete and almost all original. All of the paper and electrolytic capacitors were encased in the common Philco "Bakelite Block" type cases. The capacitors are sealed in a black tar like substance, so a heat gun was used to soften the tar and scrape out the old caps. Once the cases were clean, new capacitors were installed inside, preserving the original look of the chassis. Like usual, this radio uses a large wire wound type power resistor, and it was reading open on a ohm meter. A modern ceramic type of the same value and wattage was soldered in place beneath the original. The speaker was a challenge. Not only was the cone torn, it was also warped to an extent where the voice coil rubbed on the frame. Fabric glue was used to repair the cone, and electrical tape was used to put tension on different sections while the glue was wet to get the cone realigned.
The first thing that caught my eye was a large burn spot where the antenna coil was suppose to be. At one time something must have cooked it, perhaps lightening. Not being able to find a replacement coil, it was bypassed all together. Performance wise, the radio sounds excellent without it. Below center: the burnt area where the antenna coil use to be.
The
cabinet took the most time on this project, and most of that time
was spent rebuilding the smashed grill and missing section of trim on
the lower right corner. After several weeks of patching and gluing, the
cabinet was once again whole and solid. Mowhawk brand toners and
lacquers were used as the new finish. The replacement veneer is
noticeable, but not too bad for my first major repair. A replacement
grill cloth and decal were purchased from Radiodaze.
Back to Collection
Back to Homepage
© Copyright 2007 "Jeremy's Antique Radios"