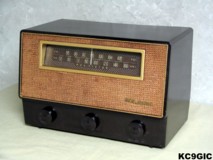
Brand: Radio Corporation of America Year of Manufacture: 1951 Frequency Range(s): 550-1600 KC, 88 - 108 MC
Tube Lineup: 35W4 Rectifier, 35C5 Output, 6AQ6 Det/ A.F. Amp, 12AL5 Ratio Det, 12AU6 Driver, 6BJ6 I.F. Amp, 19J6 Mixer/Osc.
Schematic: Available here, courtesy of Nostalgia Air. Riders 21-41
Tube Lineup: 35W4 Rectifier, 35C5 Output, 6AQ6 Det/ A.F. Amp, 12AL5 Ratio Det, 12AU6 Driver, 6BJ6 I.F. Amp, 19J6 Mixer/Osc.
Schematic: Available here, courtesy of Nostalgia Air. Riders 21-41
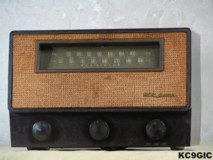
This radio was acquired sometime in 2001, after a good friend found it in a dumpster. There were several obvious reasons why it was in the garbage. It was missing several parts, including all of the tubes, the back with AM loop antenna, and the dial pointer. The cabinet was very dull, even after a good cleaning, perhaps the result of sitting in direct UV light for many years. Below center: The RCA before restoration.
Electronic Restoration
Not long after this radio came into my possession in 2001, it was torn apart and repaired. A new set of tubes was found, some new capacitors were installed, and the radio was playing somewhat. At the time, this was considered victory, with my limited electrical knowledge and troubleshooting skills. Now lets jump forward about five years, after years of electrical school and experience. In February 2006, this radio was looking rather bad still, and didn't play that great, it was time to be restored correctly.
Popping the chassis out, I was surprised that this thing was playing at all. With a good schematic in hand, the fun began! Someone else ( not me!) had rewired this thing, and there were many bad solder joints, and simply put, jacked repairs! Much of the wiring had to be replaced and the bad solder joints were fixed. The tube socket for the 35C5 tube was broken, so it was replaced with a NOS wafer type, same as the original.
When the chassis was powered up, the FM band was playing ok, but nothing was coming in on AM. As stated earlier, the original back and loop antenna were missing, and the loop antenna was part of a tuned circuit. Without the loop, the radio would not function correctly, or in some cases, even at all. A loop was salvaged from a junked radio, and wired in. A few weak stations could now be received on AM. After a alignment using a signal generator and the schematic, several stations were coming in.
Cosmetic Restoration
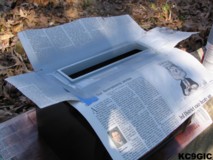
This one really needed some work to be displayed. I cleaned the case throughly, and what was left was a very dull finish. Different waxes, and Novus polishes had no effect. I decided to try coating the whole case with some clear lacquer. After removing the grill cloth and dial, I coated the cabinet with several coats of Deft brand gloss lacquer. After this had dried, I lightly sanded the case with 800 grit wet/dry sandpaper, and sprayed on one final coat. The final result looks much better.
When cleaning the case, I noticed that the area around the dial looked to have been painted at one time. Just by luck, on page 235 of the Collectors Guide to Antique Radios, Sixth Edition, there is a photo of this radio showing that area to be painted gold. It also shows the trim around the grill cloth is painted gold. Taking the time to mask off the other areas, I sprayed on a few coats of a gray primer. After this had dried, I sprayed on some gold paint. The final step was about two coats of Deft gloss lacquer. The below photo shows the radio primed and ready to be painted.